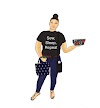
The best handmade duffle bag for travel, school or the gym, is right here!
Read on to see how this handmade duffle bag is versatile and can be used every day. It can transition from gym to travel with such ease. You just haven't realized it. : ) No kidding!
It all started with me wanting, having to (*cough, cough*), match all of my travel items. I have tons of toiletry bags, for a variety of uses. But none that matched anything bigger than an everyday tote bag. Then, I suddenly remembered that I have sewn duffle bags over the last 15 years! Both of my daughters were on weightlifting teams and we traveled weekly. All of their gear, and snacks, over their high school years took residence in what they begged me to sew - a stylish, "cool," and unique duffle bag. So ... I went to sit to sew! I would make my own bag to trot through airports with, that could stay on my suitcase and match my tote/personal bag. That led to another idea which is how I began working on the video, "Don't Buy, DIY" for back to school items you can sew yourself. Surely some parents could use it as school was starting again in early August.
The Bag. The way I make it, it blends fashion, function and durability. You can do this as well!
Fashion - you select the fabric that shows the lifestyle, the likes, of whoever is using it.
Function - The many pockets, space and shape allows the bag to easily compress for storage when not being used. Shoulder strap and handles allow for various carrying options - in different scenarios.
Durability - Strong webbing to adhere to the fabrics (in lieu of quilting it), interface, extra stitches in the right places, quality fabric and strong notions will help you create a bag that is meant to last! You can make it water resistant, just choose the right fabric! Otherwise, the ability to wash this duffle bag will help it lasts for years!
SO.... there's nothing more to say but... "Get to sewing!" Here are the materials you will need to make this duffle bag. (Then create matching accessories to go with it!)
I would estimate 1.5 yards of both the outer, and inner, fabrics. Here's the breakdown:
Outside Bag Materials
(1) Outer Fabric 18.5" W X 33" L - Outer Bag Panel
(1) Interface (fusible fleece or sew in) 18.5" X 33"
(2) Outer Fabric 8'X8" - Outer Pockets
(2) Lining Fabrics 8"X8" - Lining of Outer Pockets
(2) Outer Circle Panels - 11" X 11" for 10.5" circles (create 10.5" circles)
(2) Interface Panels (Fusible fleece OR sew in) cut to the circular measurement above
(2) Outer Fabrics 3" X 5" - Tabs for lobster Clasp strap
Inside Bag Materials
(1) Inner Fabric 18.5" X 33" - Inner Bag Panel
(1) Fabric 7.5" H X 16" - Inner pocket
(1) Fabric 7.5" H X 16" - Inner pocket lining
(2) Inner Fabric Panels cut to 11"X11" for 10.5" circles
(2) Fabrics - 2.5 X 42" - Binding Inside (for circle ends)
Additional Supplies
(1) 19" zipper
(3.5 -4) Yards of 1" webbing (for bag support/handles/adjustable shoulder strap)
(2) 1" D-Rings
(2) 1" Lobster Clasps (heavy duty) - Outer shoulder strap
(1) 1" lobster clasp for inner key chain
(1) tri-glide for shoulder strap
Optional:
(1) Inner Fabric 3" X 10" - Keychain
Watch the video. Sew. Pause it. Sew some more. Then stand bag and smile as you tag me on social media and let me see all of your unique designs! I can't wait to see them. You'll thank me later for this amazing creation! : ) : ) Get to sewing!
Nikki


0 Comments